Identify
Our mission strategy
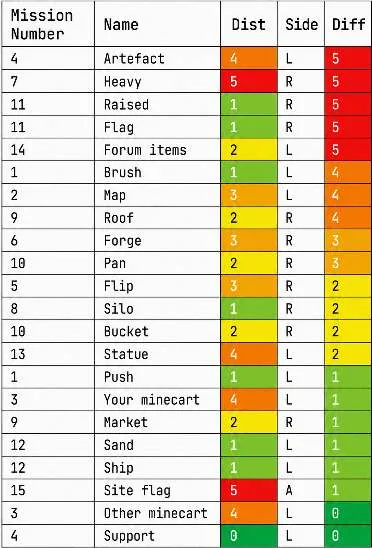
Our first stage of mission planning is where we come together as a team to list all components of the robot game and rate each in distance and difficulty, a combination of programming and mechanical difficulty. Each was colour coded, green as easy and red as hard.
The purpose of the side column is so we could figure out which zone to launch the robot from to complete that mission, saving time. If a mission was difficult it was usually because either there were many actions or programming steps to complete it, or the mechanism required to complete it needed to be complicated or large.
This was important because we could then decide which missions were worth our time during early stages, and in what order. We also took into account how much each mission was worth in points and their proximity. For example, we combined missions near each other into one run.
Making the plan
- We looked at the hardest missions first, which included M04: Mission Recovery.
- To save time, we did M03: Minecart Explorer at the same time, since it was close by and simple.
- We repeated these steps over all of our runs, grouping missions into 7 runs, eventually coming up with a mostly optimised plan.
- After repeated testing, we made small modifications to our plan to make it more efficient, resulting in multiple iterations over time.
Runs
We colour coded our runs based on an array of colours from the rainbow. We also coloured the starting positions of the robot in the home bases to ensure clarity, and in the internationals game plan we added a key.
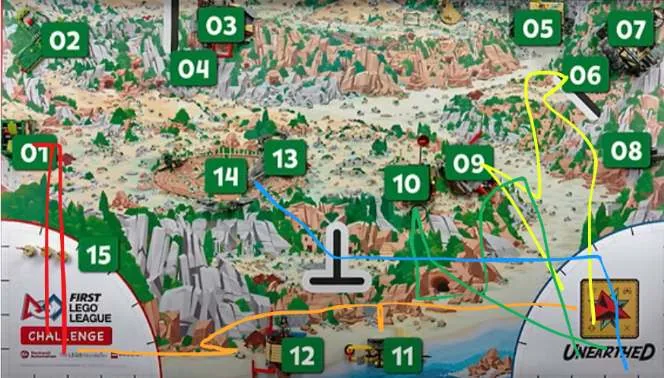
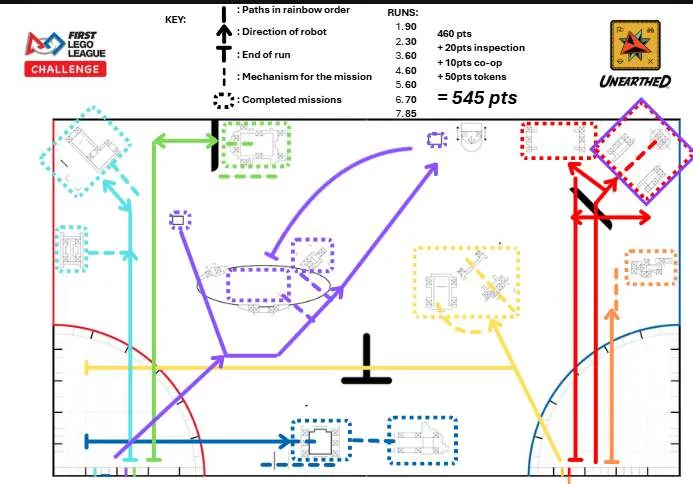
Our plan changed over the different stages of the competition. To get there we tried many different runs and different mechanisms over time, because we wanted to reduce time spent and achieve max points as our final goal. At the start of the season we decided on a simpler, achievable plan below max for regionals, and progressively increased the standard over the season towards internationals.
For the international plans we first used version one, which had too many separate launches and after testing proved to take too much time. We then decided on version two, which combined our launches to increase speed. Although we were quite happy with that result, after testing we found some missions were too long, so our third version grouped missions differently to increase speed, for example combining both Angler Artifacts and Careful Recovery.
Coding resources
We used the PyBricks and Python documentation to look up function definitions and different methods of controlling the robot through programs.
- For the heavy mission, the robot could not lift the arm since it was very long and was carrying a heavy object. We referred to the PyBricks documentation to see if there were any functions which allowed us to move the motor with more force. We found a
dcfunction, duty cycle, which could send more power, up to 100 per cent, allowing us to complete the mission. - When first deciding on the programming language, the PyBricks and Python documentation clearly described what the system could provide for our robot, which allowed us to quickly decide on Python as a team. PyBricks runs directly on the hub rather than relying on a tablet or computer, it provides advanced models like drivebase and gyro drive base, and all our team members knew Python from school so it was not a large skill jump.
Advanced resources
Another aspect of our team's coding skills comes from participation in an FRC robotics team which uses C++ and Java to program robots. Many of our team members learnt to program in those languages, which provided knowledge that those members could pass on. An example is our knowledge of object-oriented programming, where we use classes in our robot code because we learnt the base concepts through learning Java.
Grok Academy
For learning how to code in Python, many of our team members used Grok Academy in school and in their free time, improving their coding skills and allowing everyone to know how to control the robot.
Building resources
Building resources we used include watching YouTube videos on the missions so we could construct the routes for our mission plan, and using BrickLink Studio and its documentation to CAD our LEGO mechanisms. We also talked to more experienced teams that achieved high points in robot games from our state, such as BrickToThe Future and TidalTumble Robotics.
From FLL Robot Keeps Drifting? Here's Why (and How to Fix It) by Next Level Teacher, which explains the code and mechanical failures that cause FLL robots to drift left and right, the main change we implemented was to lower the centre of gravity of the robot and switch the wheels to thicker ones with tyres.
From AWESOME One-way Door Designs for your FLL Robot by RoboticsRulesCompetition, we took one-way door mechanisms into the build for Mission 7: Heavy Lifting and Mission 10: Scale Pan. Before, we were using arms that could not hold the objects properly and sometimes let them escape. The one-way gate allowed the objects to enter the mechanisms but not escape.
We also asked TidalTumble Robotics, a past FLL team who have achieved high standards in robot games many times, about accurate turning and movement, and requested them to take a look at our code. That helped us improve our own robot by implementing their suggestion of using dynamic acceleration in robot movement.
Design
Contribution of team members
Brainstorming as a team. Brainstorming allowed every team member to share their opinions on which missions we should attempt and which ones seemed too difficult to pursue. Even a single suggestion often sparked a chain reaction, with others building on the idea, refining it, or proposing alternatives until we identified the most effective approach.
Conflicts as a team. Even though many of our team members already knew each other well, conflicts came up during discussions, especially during high-pressure situations in the last few weeks leading up to the competition. Instead of avoiding conflict, we allowed everyone to express their opinions and used it as an opportunity to create the best solution for everyone. At the start of the season we resolved issues informally, but as the season continued we built a plan for identifying and resolving them.
| Our steps | Example |
|---|---|
| Identify the issue. | Uneven workloads and communication issues. |
| Let each member explain their view. | Some members felt left out, others felt that some members weren't doing any work. |
| Focus on team goals over personal preferences. | Win internationals, so everyone had to contribute. |
| Use past experience or data wherever possible. | Last time we just let them be, which we decided was a bad idea since less work would be done. |
| Agree on what to do in the future. | Making it more clear to all team members about work assignments, and more discussions. |
| Reflect on what could be improved. | More follow-up is needed after discussions, members could forget. |
Prototyping. Prototyping enabled our team to experiment with a variety of mechanisms and approaches for completing different missions. We evaluated multiple concepts, compared their effectiveness, and refined our ideas based on testing results.
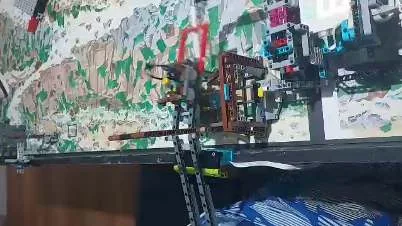
GitHub. We used GitHub as our main platform for managing code and tracking changes. It allowed all team members to work on the code at the same time and know what other team members were doing.
- Because everyone can contribute, it allows newer members to learn by doing while still keeping our work organised and version controlled.
- Experienced team members created a guide so others can understand how to use GitHub effectively, from making commits and pull requests to contributing on the code.
- All our repositories are public, which means other FLL teams can explore our robot code, website projects and pathfinding experiments for inspiration. They all live in our Lebob-Robotics GitHub organisation.
- Parallel work lets all members contribute to coding simultaneously, and reverting code lets us go back to past versions through commits.
Discord and Trello. We used a combination of Discord and Trello to keep all of our team members, parents and mentors informed and organised throughout the season: sharing session schedules, coordinating attendance, communicating plans and changes, posting updates on sponsorships, outreach, notes and goals, and sharing photos and files.
Building skills
Each person created around one attachment used within the runs. Despite not all of them being used, they were considered and tested before deciding not to use them. For each attachment we based the design on three engineering principles:
- Simplicity. We keep our attachments simple but reliable, so they complete missions consistently and are easy to maintain if they break. We focus on passive mechanisms, which complete missions without a motor, reducing the need for gearboxes and freeing the limited motors for other missions in the same run.
- Efficiency. Attachments complete missions quickly and in combination with others, to reduce overall run time. Instead of designing mechanisms that handle one task slowly, we group compatible missions together and build attachments that perform multiple actions in a single trip.
- Reliability. We build with strong safety margins so attachments operate without missing game items. We use hardstops to physically limit movement and set the mechanism to a determined place found by trial and error, and we rely on sensors built into the hub to keep the heading accurate.
The gearbox
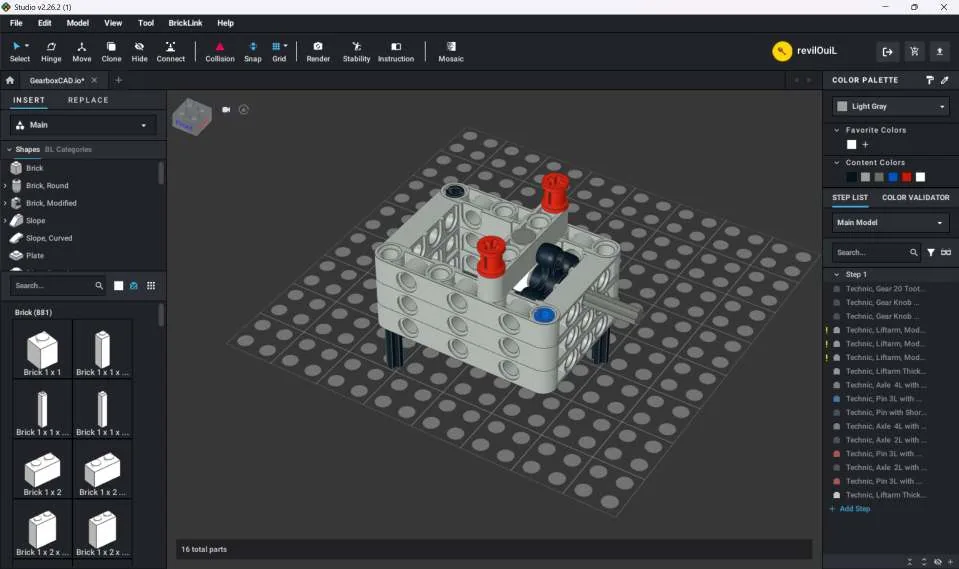
Holes around gears for easy attachment and a reduction gear ratio so that we can increase torque. Attachments have pins in the bottom so that we can slip them in and out easily. The attachments are driven by two large motors with small 12-tooth gears.
The attachment library
- Attachment 1 is for run 1, completing three missions with three moving parts. The longest trident-like arm grabs the heavy artifact, the cage collects and brings back the boulders, and the last mechanism flips over the plant surface. It does this all in one motion and then returns, bringing the artifact and the boulders back with it.
- Attachment 2 is solely for the silo mission. The large arm smacks down on the lever to launch out the planted gears with strength. The gear for this attachment is changed so there are fewer but bigger teeth, allowing a larger torque to be created.
- Attachment 3 does two missions with two arms. The right arm knocks down the bucket and latches onto the back of the marketplace to lift it after the robot moves back. The left arm rotates on an axis so it can catch onto the scalepan to pull it out.
- Attachment 4 uses two yellow prongs to precisely grab the artifact from under the mineshaft rails, while the other arm completes the minecart mission by raising the rails.
- Attachment 5 is used for run 5. The yellow arm picks up the artifact through the grey ring, and the other two arms push and rotate the other blocks of land.
- Attachment 6 is for run 6, completing two missions simultaneously. The longest arm carries gears at the end to reach over the shipwreck, jamming into the gears of angler artifacts and turning them. The arms at the bottom complete the shipwreck mission passively, and a passive mechanism releases the flag into the mission on return.
- Attachment 7 is for run 7, completing three missions. The right arm does the statue and picks up the opposing team's minecart, placing it in the forum. The left arm places one of the site markings down, while a passive second arm is released to place another. The collection at the front holds all of the objects placed in the forum.
The fake robot. We created a skeleton bot for making the mechanisms. It let us code on the real robot with the mechanisms we already had, while making improvements or new mechanisms for other missions at the same time.
Create
Innovative code and sensor use
We based our code on programming principles to ensure our code is robust, readable, maintainable and modular.
- Robust. Ensuring the code is impossible to break or crash.
- Readable. Making sure all team members can read our code, achieved through using classes to group drivebase functions.
- Maintainable. Detailed comments and functions used all over the code to keep it easy to maintain.
- Modular. Multiple files in our codebase and many modules imported, to keep the code short and re-use existing code.
Using PID. PID stands for proportional integral derivative, used to create smooth and accurate movements of arms and wheels. Because we used PyBricks, we can set the drive base to use the built-in gyro in the Spike to align our movement for better accuracy, as the module already implements PID. We also created our own PID controller in our nationals code for more accurate turning, but found that the in-built one was sufficient.
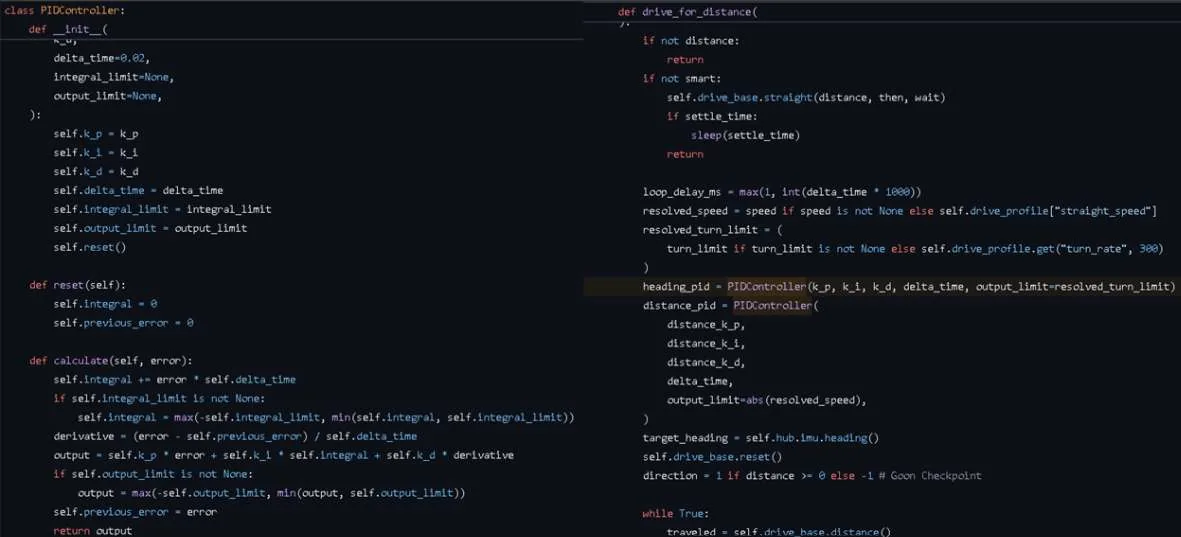
Resetting the angle of the mechanism motors. We made a function called move until stalled, which moves the motor at a certain speed until it is unable to move physically at all. This lets us align the motor to a certain surface for better accuracy, and means people do not need to set the mechanism to the right position in the pit stops.
Automatically updating menu using decorators. We used a decorator to automatically add new run functions to our robot menu, which saves time when coding runs.
Our own mission selector. We created our own menu in code to have the features that we wanted, which also let us change and adapt it however we wanted.
Mission autosave. This uses the hub's non-volatile storage to save the next mission index before a run begins, so the robot is ready to run the next mission if the code ends forcefully. It translates the mission number to binary and stores it on the hub, which saves time because technicians do not need to reselect it from the mission menu.
How our code works
This system uses object-oriented programming to keep the robot's code organised and efficient. A LebobDriveBase class manages motors, drive settings, gyrometer and arm movements. The MissionControl class provides a user interface on the hub, letting users select missions during matches, and it also manages animations, gyro resets, drive profiles and timing. Missions are added with an @mission() decorator, and each mission function leverages Robot helpers for reliable driving, turning and arm control.
The two attachments we think are most innovative
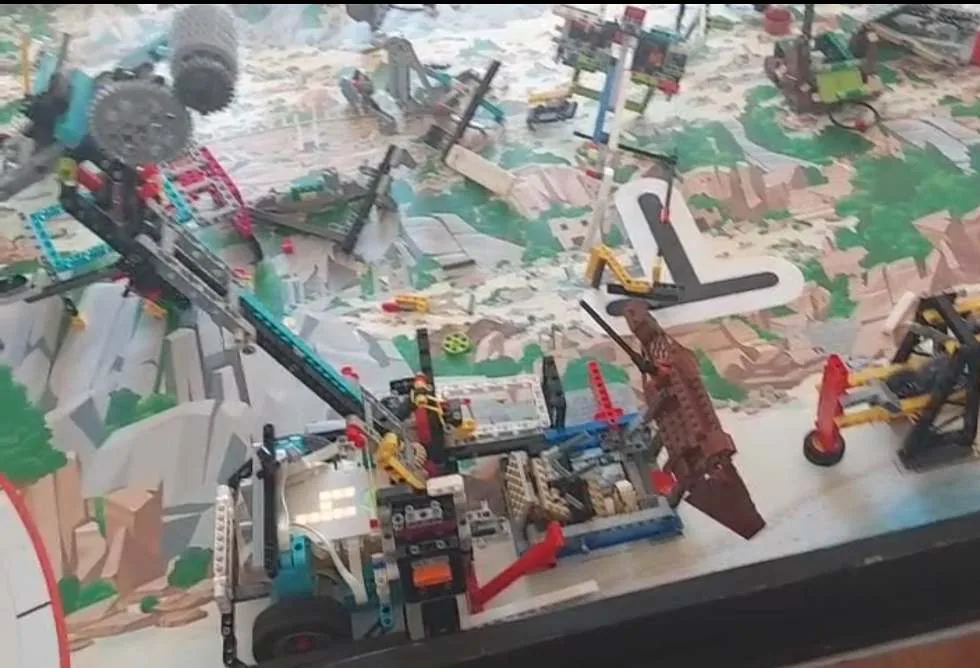
Attachment one is innovative because it uses a single gearbox to power three separate arms at the same time. Each arm is designed to move in sync with the others, allowing the robot to complete multiple mission actions in one motion. Combining three mechanisms into one coordinated system increased efficiency on the field. It also supports the mission strategy we set out at the start, where we save time by doing missions at the same time.
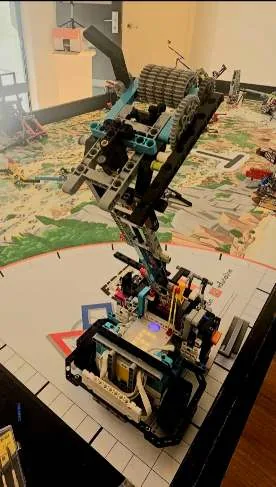
Attachment six uses two separate gearboxes to perform a single coordinated task. One gearbox controls the vertical movement of the main arm, lifting it up and down, while the second rotates a set of gears through a long axle to trigger additional actions. On the right side, a passive arm automatically pulls the sand back as the robot reverses, requiring no extra motors. At the front, another passive element drops the flag into the ship as the robot drives forward, and the left side extends outward to push the ship into position.
Iterate
Repeated testing of robot and code
Logging. We created logs for most runs we tested on our robot, describing what happened and how we fixed it in real time after every test.
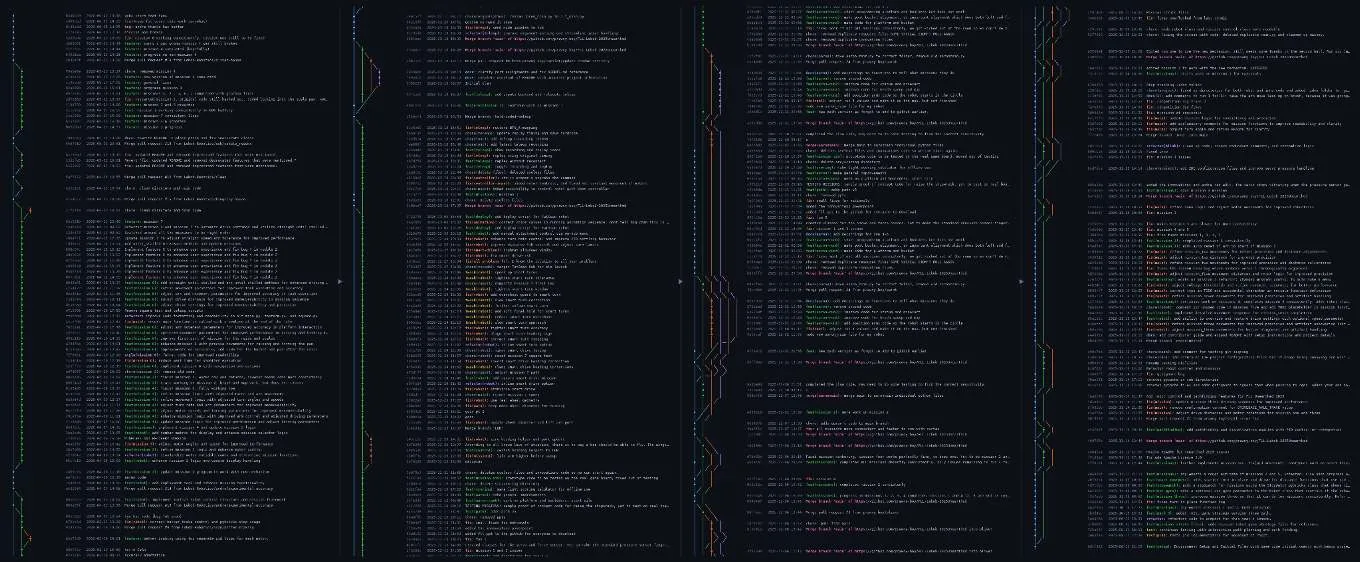
GitHub commits. We used the commit message system to track changes and allow collaboration, so everyone could contribute to code. We ensured all team members followed a naming convention for consistency, and used multiple branches for working on different sections of the code. Over time we accumulated many commits, which let all team members see how our code changed and backtrack to old code if newer code broke.
Improvements based on testing
Base robot. We tested several iterations, trying different friction-reducing supports like a plastic bulb and a caster ball to see which gave the most consistent and stable movement without swerving. Our final design used two medium motors for the wheels and two non-friction wheels for balance, with two large motors and gears powering the attachments. We kept the centre of gravity low and avoided hanging cables to make the robot more reliable during runs.
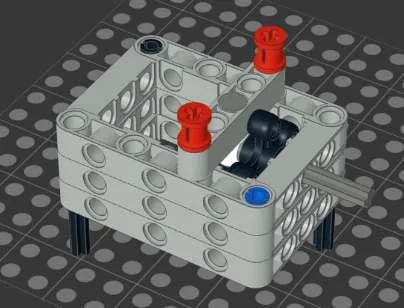
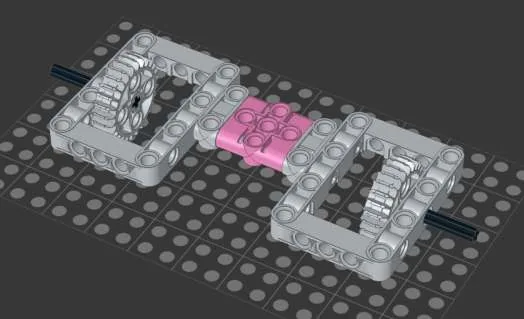
Gearbox. Something we noticed after our regional competition was that changing the attachments on our gearbox was extremely tedious, and it was limiting the points we could get. Most of our time went into changing the attachments rather than the robot getting points. We did not have time before nationals to change the gearbox, because changing it would mean restarting the robot and its code. After the competition we developed different versions against four criteria:
- Perpendicular transmission. Arms should be able to rotate horizontally.
- Vertical transmission. The robot should be able to rotate arms vertically.
- Reliable gear meshing. The gears should reliably mesh and should not skip under large loads.
- Easy attachment switching. The pairs of gearboxes should slide on and off without the need for additional locks.
Code. To ensure our runs were consistent, we constantly improved our code and mechanisms after running them repeatedly. It was very slow, but we ended up with consistent runs which can be run multiple times without failing.
Communicate
It's about the friends we made along the way.Kingsley
This was what we learnt in FLL: to achieve a lot, but also know that we cannot be perfect, and we just need to do our best.
- Working together. As a team we learned how to support each other and stay connected, even when things got tough, like physical sicknesses or power outages.
- Division of work. Splitting up tasks works much better than having too many people crowd around one job. It kept us organised, efficient and a lot less stressed.
- Gracious professionalism. Throughout the season we practised GP by helping rookie teams in our competitions and in our school club.
- Healthy work environment. We focused on making a space where everyone felt comfortable, supported and included.
- No big changes. Last year we rebuilt the whole robot before nationals and ran out of time to code it properly, which is why we lost. This year we adjusted the path instead, which meant far less recoding.
- Documentation. In the past we did not keep proper records of our testing or progress. This season we kept a real logbook, which gave us clear proof of what we tried, what worked, and how we improved.
- Communication. Communication used to be messy, but using both WhatsApp and Discord made sharing updates, photos and announcements far more organised.
- Organisation. Trello helped us keep track of tasks and see what needed to be done.
Comments from the team
Sean. I am proud of how good our robot turned out, considering the short amount of time we had to build it. We achieved an amazing score. One thing I learnt throughout this journey was PID, creating my own custom PID controller for robot code, but we didn't use it.
Andre. I really appreciated our team's effort this semester, everyone put their best work into this. I learned FEA and how it can simulate stress on designs to point out possible issues, such as weak points prone to breakage.
Kingsley. I am very proud of making the robot and some of its attachments. Our teammates collaborated and worked very well together as well as listening and interpreting different things. Over the season I improved at CAD, especially while doing it for the innovations project.
Chris. I am very happy to work on the robot this year, and having the chance to work on the robot allowed me to expand on my existing knowledge and abilities of making mechanisms.
Leven. I am glad that I was able to gain this experience, as it was only my second year of robotics, being able to contribute ideas to all aspects of our project, designing a mechanism, working on documents, and being on the board operating the robot in nationals.
Oliver. I think our team collaborated very well, and we all cooperated to complete the mission to the best of our ability. I learned how to express ideas simply and I can also use this skill in presentations outside of school.
Aaron. I think that my team helped me understand the code that they wrote, told me what errors to fix, and collaborated well across all categories in general. The group chats made it easy to be organised and to communicate. I learned how to CAD in Onshape and how to design complex mechanisms to do multiple things at once.
Subesh. I believe that our team worked cohesively throughout this semester, despite setbacks with delays in receiving the mission models. I learnt how to CAD using Onshape so that I can use this skill in engineering and design outside of FLL, like school and FRC.